Reviews
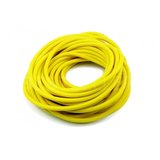
It is consistent and long-lasting. The Torrey Pines Gulls use it for our monthly contests and our 2-day Coastal Cooler F3L. We tried other types, and they didn't last 6 months.
We zip-tie the heat shrink at the end to prevent the ring from pulling out.
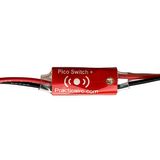
This magnetic switch works well and is the ideal answer for switching between races for our radio sailing allowing the battery access to remain sealed and waterproof. Connectors changed to better XT30's otherwise all good - just the job and excellent service.
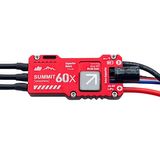
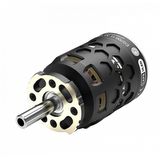
Very nicely made ESC. Fairly easy to programme using Heli32 (as suggested I did have to download the test version). In many years of dealing with Neil the service has always been 100%.

Excellent little servo. Quick, accurate and reliable. Made a huge improvement over a previous installation which frequently failed to centre properly. Definitely worth the money.
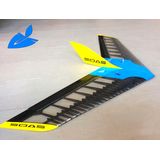
Fits wing and fuse perfectly.
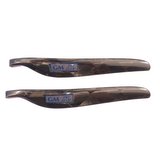
Much stronger than my homemade ones that would break in a hard landing.

Very high quality, just the thing to protect your model with pride.

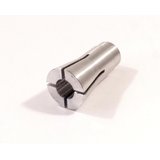
Usual Schweiger precision machining.
Thanks to Neil for making correct part available and expert packaging for shipping.
Also, thanks to Neil for dealing with a difficult Customs bureaucracy with persistence.
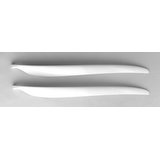
I have purchased these blades before and they are of excellent quality. As always the service from Hyperflight is also excellent.
Not yet built as this is a future project, got a few on the go.
Package arrived in a timely manner in perfect condition.
Unpacked to inspect, all nicely cut and well packaged parts and fittings.
Very pleased looking forward to building soon

Perfect product. Just a light sanding to get the fit. Pity about the 4 month delay by Aeroic supplying Hyperflight.
Not yet built as this is a future project, got a few on the go.
Package arrived in a timely manner in perfect condition.
Unpacked to inspect, all nicely cut and well packaged parts and fittings.
Very pleased looking forward to building soon
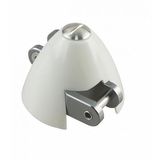
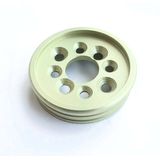
Very well engineered spinner and paired with the recommended GM 10 x 6 prop is a perfect fit for my Omega.
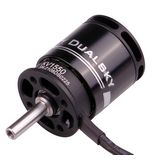
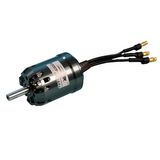
A great pairing with the Dualsky caged motor. Ideal for slim moulded bodies and great performance. Thanks for the recommendation Neil
So simple to fix in a tapered fuselage and with the leads running out of the back of the motor and the caged body no concerns with rotation wearing the leads through. Paired with the Dualsky slim 60a esc the power output is really great
Hyperflight was the only source I could find for this hub size.
Love dealing with Neil! He is the best!

Fit perfect and as advertised on my Paradigm. NOW, can we get them in different colors. 😁
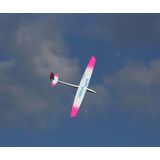
Ordered this glider which was hard to find, received the next day well packaged and undamaged, This is my second NG2M and I love this airplane !!
Product is exellent, but EU taxes not...
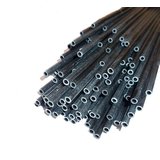
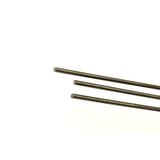
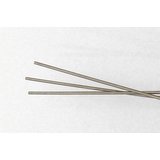
2.0mm carbon tubes arrived in double quick time allowing project to be progressed before deadline.
High quality products and unrivalled service from Hyperflight as always ...
2.0mm carbon tubes arrived in double quick time allowing project to be progressed before deadline.
These motors are amazing and fit the sugar glider folding prop very well. I just wish the shafts were a bit longer as I'm trying to fit a folding pusher and failing miserably.
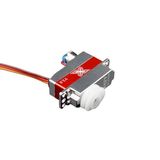
Great servos and the torque is also excellent at 6v. I just make sure the esc I'm using will supply enough Volts for max torque. I've never had one fail and they appear to centre pretty well enough for my needs.
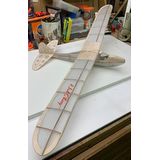
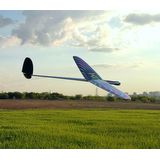
Great little glider. The kit was easy to assemble and all the parts fit very well. There were a few differences between the kit and instructions. It would be nice if some of the photos could get updated. But all in all the parts that weren’t clear from the manual were pretty self explanatory even for an inexperienced builder like me so no big deal.
After adjusting cg during initial trim flights total weight was 86g. I used featherlite covering, a small 1s 350mah battery, and an er6gv receiver. Needed about 3g in the nose. Very impressive for such simple construction.
This is my first dlg so I’m hardly a good judge, but flight performance seems excellent. Much easier to catch small thermals than my small hi-start gliders. Very maneuverable so excellent for small-field flying.
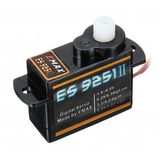
At first I used super cheap 3.7g servos. On one launch my elevator servo stalled out because something bound up in the gear train, resulting in an uncontrolled nosedive from 12m after I nosed over at the top of the launch. She hit HARD, went straight in. Surprisingly, the only damage was the vertical stabilizer breaking off the carbon boom and a crack in the fuselage side at the first bulkhead. Both easy fixes with a bit of CA. She is much better now with emax 9251 servos.
Top quality products as always from hyperflight and 5 star service.
Very useful if you want a good fit for propeller blades on an abrupt 30 mm fuselage.
Cut away the original firewall to match this 32 mm motor mount, and your propeller blades will match perfectly to the fuse.
Excellent small servo. Used on spoiler, 2mtr res.
I brought this for an F5L model.
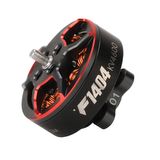
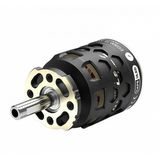
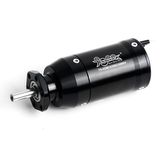
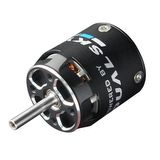
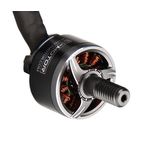
It delivers amazing power on a 3S lipo and a Dualsky 8x5.5 prop. Pulls about 22amps so gets to 100 metres very very quickly. It’s such a small motor to deliver that power. Impressive.
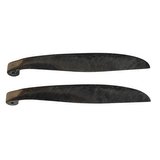
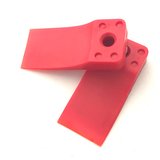
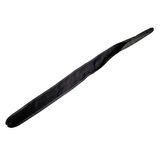
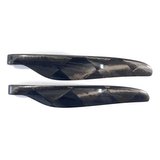
I am using these blades in a pusher config on my FPV Wing - they draw 3 less amps while losing no thrust compared to the stock prop that came with the kit.
This is a very powerful and lightweight motor. Exactly what I needed for my flying wing. The service at Hyperflight is second to none.
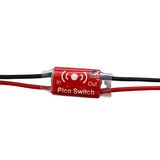
I needed a switch that would fit down inside a scale glider fuselage with easy. Access. This little switch has fitted the bill. Switching on is no problem at all as if the toggle is anywhere near the switch it works. Switching off however is a little more tricky. it usually takes a little fiddling around with the toggle to switch off. Having said that, it is still better than having to take the cockpit to bits to switch the gear on and off.
I found that the kit largely went together like wooden lego. I did have some prior experience with old Gillows kits back in the 90s, but I think someone new to the hobby who was reasonably "crafty" could build this without too much trouble.
The main stumbling point where even I was scratching me head are some areas where the English translated instructions leave out critical details, are out of order, or both. I highly recommend this glider kit. I purchased a Dualsky 38 millimeter spinner with propellers, and I found they can't actually fold back without hitting the nose of the fuselage. Had to carve away some of the root of the blade in order to get them to close all the way. I chose the reccomended Xpower motor + 60A esc + 10x6 prop and it has near vertical performance. The Xpower pulls 50 amps on 3s. Its cased motor design cant short out on the power wires like a Hacker and the wire routing is much cleaner.
Mine came out perfectly balanced at the recommended 87mm CG point with an 800mah pack. if you want to use the 1300mah pack you might end up adding a little tail weight, or skip the lightweight oracover on the tail, or use a light weight carbon prop and nose cone. Frankly, the fuselage is a little tight for a 1300mah pack so i reccomend staying with the 800. You're still gonna have something like an hour of thermal time.
As always excellent service from Neil / Hyperflight have not used the motor yet as still building the (Inside) but offered the motor to the fuselage and it’s just what is needed thanks again.
I had previously bought and used one of these switches with great success and decided to equip two further models with them at short notice ahead of a flying event. Hyperflight dispatched my order rapidly and without fuss and the tracking data kept me fully informed on their journey in the post system. They were both installed in models and I am delighted with them.
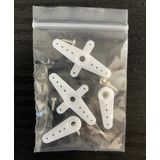
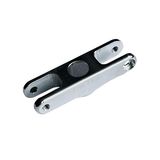
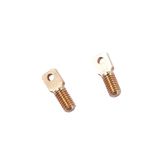
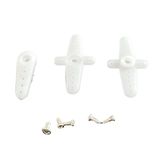
Yes just as expected work fine exact replacement for existing arms but with a higher shoulder so the control rod does not catch the servo
casing
Purchased for a future build. I have had 4 in use for some time, excellent little servos, very quick and precise. That description applies to Hypweflight's service as well.
To go in my repaired VM Plus, not used yet, just checked to see it operates as advertised. No problems with that. Shipping to New Zealand in line with Neil's usual exemplary standard....even in these strange times
This has got to be the easiest covering I’ve used, shrinks very well without any issues. Found SMS acrylic lacquer covers without wrinkles. Some aerosols cause it to lose its shrinkage but a medium heat from a heat gun soon puts it right.
Fantastic HLG kit to build and fly, arrived fast from UK to Aust. The team at HyperFlight could not be more helpful
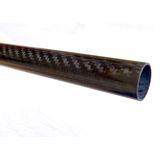
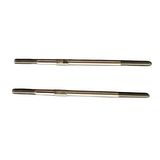
Order a length with an unconventional use. Surprised how well finished and rigid this was considering its thin wall section. Will definitely order again.

Shipped from UK to Florida much quicker than USPS delivers mail from across town. In the box was found to be Extremely well laid out and package kit. Very easy to build. The only gripes are very minor. The spoiler system. Just built it alot simpler than directions and a few of the ply pieces the lazer didn't cut through. Would definitely buy again. Great plane!
That's very confusing, because I've been using them Glued in DLG's and Similar Models for years now. I fear the review below may be more down to inexperience than experimentation with various bonding materials. I use these in numerous Customer Build, with great success.
These push rods are very brittle because they are carbon fibre composite. You can NOT glue them to M2 stainless steel pushrod ends and you can NOT hold them with fix screw to the control horn or servo arm. I would prefer to buy them in steel push rods and use fix screw to attach them to the servo arm or control horn
Great servo
fast delivery

Fit and finish of the model is excellent. I was particularly impressed with the control surfaces. The glass version is super lightweight and strong. The radio equipment area is a little tight, but that is typical with this type of model. The shipping, although expensive, was fast. I received the order within a week of ordering and the tracking was excellent. The only gripe I have is with the lack of well written assembly instructions. There is also very little information online to help. An inexperienced modeller will probably struggle with assembly and setup. This was the only reason for the 4 stars.
PROS
Seems built to high specification I'm impressed hence 5 star rating. The delivery was fast from the UK to Crete Greece. I am now waiting for the servos and other anciliary parts befor starting the build.
Excellent service from Hyperflight Thanks.
CONS
No buld instruction in box. 2 Star rating on instructions. The internet instructions manual does not have a comprehensive description for assembly. Poor photographs with no captions. Leaves a lot to the imagination. I will work it out but must proceed slowly. Recommended servos not available. The instructions have not been updated!
Very disappointing!
OVERALL
I am sure it will be fine Fingers crossed. It will be fun! Looking forward to flying it!
I was happy with the quick delivery and the product was well packaged and good quality.
Great DLG kit very happy with the quality. The only thing that lets its down is the instructions online only show the older version of the kit. This 2.1 version has a slightly different wing design. Nothing that couldn't be worked out from the plan and older instructions though!.
Original servos not in stock so agreed replacements could be sent. New servos are excellent and do the job perfectly. The only issue I had was the refund for the price difference took a while to sort out. Other than that I'm very happy
I needed replacement batteries for an animal sonic deterrent. Arrived in good time and seem perfect for the job.
Having purchased a scale glider from CZ I saw that there were no servo covers in the package. I have used plastic ones from Neil before but they were out of stock and the only ones available were the carbon items. They were very slim and easy to cut to shape. They also took paint well to blend in with a the underside of the wing. They have done the job very nicely.
Some how much English address ended up with France being the country and so although the city and county were in Sussex it was posted to France. I called when the product did not arrive and was told nothing could be done and I’d have to wait until it return too the UK. STILL NOT RECIEVED ANYTHING AND NO SIGN OF GOODWILL TO SEND ME ANOTHER REPLACEMENT
This works really well, much better than the standard multiplex wedge that came with the robbe monsun, got a pair that live in the toolbox, got both sizes, must have item
Some how much English address ended up with France being the country and so although the city and county were in Sussex it was posted to France. I called when the product did not arrive and was told nothing could be done and I’d have to wait until it return too the UK. STILL NOT RECIEVED ANYTHING AND NO SIGN OF GOODWILL TO SEND ME ANOTHER REPLACEMENT
Great servo
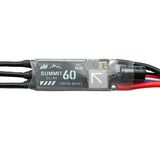
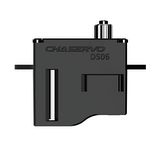
I was using one of these in gps light class pk2pro. Teeth on pinion gear shredded after about 15 launches on 3S and 16x8 GM prop. Used in combination with summit 60 hv bec. Believe damage caused by too harsh brake setting. Have reset brake to 50% with 2.5 sec motor ramp. Worth continuing as combination is much cheaper than the alternative inline combination. The gearbox is repairable with parts I ordered from Tenshock . Hyperflight should consider ordering gearbox spares and pinion pullers which are available from the factory.Replacement arrived quickly as usual with Neil’s excellent service.
Very useful Hyperflight replacements for worn horns in a 3m sailpane.
The order arrived promptly and in perfect shape. I was very pleased with the quality of the product. My only issue is the minimum shipping price to the United States
Is extremely expensive to the point that ordering small Items makes no sense. Paying 35 dollars for shipping on a 20 dollar roll of oralight is a deal killer.
Hyvä liidokki kiitos
Good communication and quick delivery, products as described
Used for tail feathers on my 2.5m glider.
Just flown it, works great. Great value for money servos.
Just what I needed for making fishing spinners excellent service on this transaction

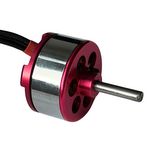
Spinner is great for Prime Q. I had to trim the skirt of spinner down a bit to get more of the shaft adapter onto the motor shaft, to ensure a good grip. Well designed, and works very well.

I've used a dualsky esc before in a F5j model. They're smooth and efficient. Easy to program, I recommend you get the usb programing adapter, as the braking function, as standard is quite sharp, and you need to reprogram it. I highly recommend them. This one is great, small and easily tucked into my Prime Q.
Great motor for Eres Prime Q glider, pulls model up, very quickly. Smooth and efficient, I'm running 530mah batteries and I can easily get three lifts to 100m
Very good servos, extremely fast, good torque, high update rate and acceleration. Would be nice if they came with circular servo horns. They use 25T spline.
Unbelievable fast delivery from UK to US. Very well packaged, no missing parts. Easy to put together and a treat to fly once it’s all balanced and fine tuned.
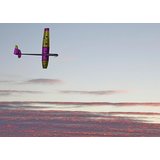
There are so many positive reviews already, and everything written about the WEASEL is true, so no need to add to those excellent accounts.
Neil’s service, as always, leaves no room for improvement. Ordered the model, battery and servos, it was shipped before I had finished my coffee, and arrived in Australia 5 days later.
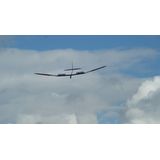
Maidened yesterday in very strong winds, ballasted with as much Pb as I could cram in.
What a blast‼️Fantastic model, fantastic service.. 👍🇳🇿
Received very quickly and just what I wanted
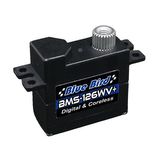
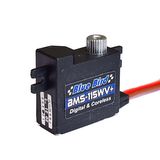
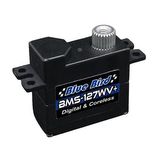
The little Blue Bird servos, BMS-126WV, are amazing. Twice as powerful as the old “standard” servos, more than twice as fast, and able to work well over a wide range of voltages. 4 NiMh up to 2S LiPo. And with metal gears able to stand the rough and tumble of my local slope. All this in a small package! And lastly, at half the price of my usual brand.
Perfect !!!!
Very good servos 10 out of 10 these for my LOADED DICE III
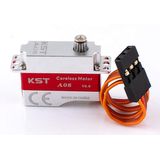
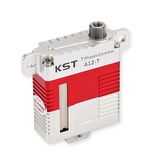
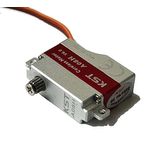
Great Service - quick to send and brilliant KST servos
Great switches these, have them in most model gliders where there is not much room for conventional switches plus saves having to open up model or unplug after every flight. Great reliable service as always.
My former brko dlg is now a f5k modell. This motor is strong an light
Great kit, plenty of information via YouTube and forums. Great balsa and ply, would have liked a contents list to check all the parts but didn't take much effort to determine the parts included.
Easy build if you have experience, and quite fast.
Rate this product highly, I have used it to cover an E20 and found it easy to use and puncture proof,great for repairs to tissue and for 'windows' also ,in desperation,after covering a wing in some poor tissue,put this over the top as an experiment really,but it worked well-Good stuff..
Bought to try out with my F5J models and I couldn't have hoped for better :)
Well made, good value and fits my X-tail NAN Explorer BF, Q4 and Challenger Fuz very well.
Just what I needed to try my 1m dlg on mini hi start ! Very rapid delivery (as usual !)
Gm propellers are the best ...quality first class.
Service is outstanding.
I wasn’t going to do a review of the service regarding my recent order but I got an email from Neil requesting one so here goes. First of all my previous orders were always packed securely and arrived with no damage. However this one was sent in the actual box that the Grunau Baby comes in. Very light weight and compressible. No one with any sense would Fedex it to another continent that way. But that’s what happened. Before shipping, one end of this light weight box was opened and all the other items I ordered were pushed in along with some wadded up packing. When the parcel arrived, the label on the box was flapping freely and the previously opened end was crushed and distorted. When I opened the box several fragments of broken balsa fell out. When I emailed Neil the response was “sorry but I had run out of my usual boxes”. Not a very adequate response in my opinion.

Kit arrived in NZ without damage. Contents are very well packed. Wing section looks interesting and should penetrate well. I stated putting the kit together straight away. Laser cutting was superb. I couldn't believe the quality of the balsa, absolutely fantastic. Kit went together without any problems, ply forms for gluing the wing pieces together made sure everything stayed straight I was very pleased with the result. The result is a very tidy finish, perticularly if using CA. The only down side is the supplied spring loaded / pull mechanism for the control surfaces, it might be OK for a glider but not a powered F5L. Blow back of surfaces would occur, I changed to carbon rods in plastic outer. Now to have some trial flights to see how it flies.
Getting back into RC gliders after many years. I ordered the Eli F3-res. I’m
Amazed how quickly it arrive (from UK to FL in less than 4 days). Everything arrived safely. Cant wait to get it assembled and in the air. Thanks Hyperflight!
Bought for an indoor scale model, do the job just fine, top service from Hyperflight.
Bought to get different heights above the servo cases for clearance in a tight installation, work well, excellent service from Hyperflight.
Work well for my application in a tight installation, excellent service from Hyperflight as always.
I rang Neil for advice on servos for my new Ahi. His suggestion was these servos. Very fast, powerful and wide voltage range.
Order placed Friday afternoon, about 16:00.
Order delivered Saturday morning!
Very pleased indeed.
I like their products as shown on their website. This is my first purchase from them. Everythingw ent fine.

Well built, solid piece but yet to use it. The service from Neil was as usual, fast despatch, and good communication. Neil sets a great standard.
A well presented kit with perfectly cut laser parts. With a bit of translation from phone it went together well all parts fit nice, I nice plan to show all views. Cha servos fitted well with no modifications, dual sky motor fitted with a bit of sanding on inside of fuselage. Balanced with 1300 lipo spot on. Overall very pleased , test fly this morning !
As usual, the same great service from Neil. Delivery was fast, given it was to Australia, product was good. I usually buy the carbon shrouds but these are a great cheaper alternative.
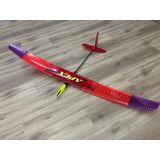
Always great service from Neil. Like my previous 4 Purito's the Apex is a beautifully manufactured model. Same precision from the same designer...
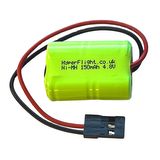
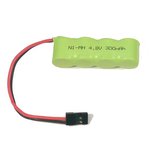
A perfect size, and very neatly assembled little battery for my current project. What I am impressed with is the service offered. I had next day delivery service! The item came well packaged and clearly addressed. Well done Hyperflight.
This is an incredible plane to build and even better flying

Made a electric Fuselage for my Purse V2 used one the light weight motors and it flying as well as I hope it would
HyperFlight have a good selection of products, great prices and very good customer service. Will definitely recommend them 👍🏻
I never received the product hyper flite tried to get me to pay there teriff
Superb little battery, great for gliders mainly the size and safer than lipo
Looking forward to building this. Advice and service was top notch. Bought this for pleasure flying but I liked the look of the instructions and the fact the plane is described as suitable for wind and calm conditions. Excellently packaged 👍